Shop Installation
General
Here you can find the documentation for installing and deploying the Platyno Shop.
Use the Provisioning Script to create the necessary data structures for the Platyno Shop.
- See the Provisioning section for instructions on how to use the provisioning script.
Logic Apps handle the operations of the Platyno Shop.
- See the Azure Logic Apps section for an overview of configuring (and setting up authentication) in the Logic Apps for your Platyno Shop.
Provisioning
With the provisioning script you can automatically create the necessary data structures for your Platyno Shop.
Prerequisites for running the provisioning script are:
- An installed version of the Platyno Shop module on your tenant (You can find instructions on how to install it here)
- A Site Collection (It is recommended to create a new standalone site collection for the store).
Click Download to download the provisioning script.
Unzip the files.
Open PowerShell and navigate to the folder you unzipped earlier (or open PowerShell in the unzipped folder).
NoteThe script requires PowerShell version 5.1 (or lower). This is pre-installed with Windows 10 (and Windows Server 2016). PowerShell Core (v6 or v7) are not supported.
To run the provisioning script Install-Shop.ps1 you have two options:
Run the script as follows in PowerShell
.\Install-Shop.ps1and answer the configuration questions with y (Yes) or n (No).Or run the script directly with the parameters:
Install-Shop.ps1.\Install-Shop.ps1 -TargetWebUrl "{SITE URL}" -CreateShopPage -ShopPageName "Webshop" -SetHomePage -HideQuickLaunch -CreateStructures -ApplyDefaultPermissions -CreateShopDefinitions -CreateDemoDataParameters overview
Parameter Description CreateShopPageCreates a dedicated site page for the Platyno Shop ShopPageNameName of the store (can be changed later when editing the page; default: "Webshop") SetHomePageSets the store site page as the homepage of the Site Collection. HideQuickLaunchHides the left Quick Launch Navigation and therefore shows the store in full width CreateStructuresCreates the data structures for the store automatically ApplyDefaultPermissionsApplies default settings and permissions in the store environment:
- Visitors group gets permissions to edit (instead of read)
- Members group gets permissions to participate (instead of edit)
- Unique permissions are applied to the ShopBasket, ShopOrders, ShopOrderItems lists.CreateShopDefinitionsCreates standard demo entries in the ShopDefinitions list CreateDemoDataCreates demo products in the store
Azure Logic Apps
Create app registration
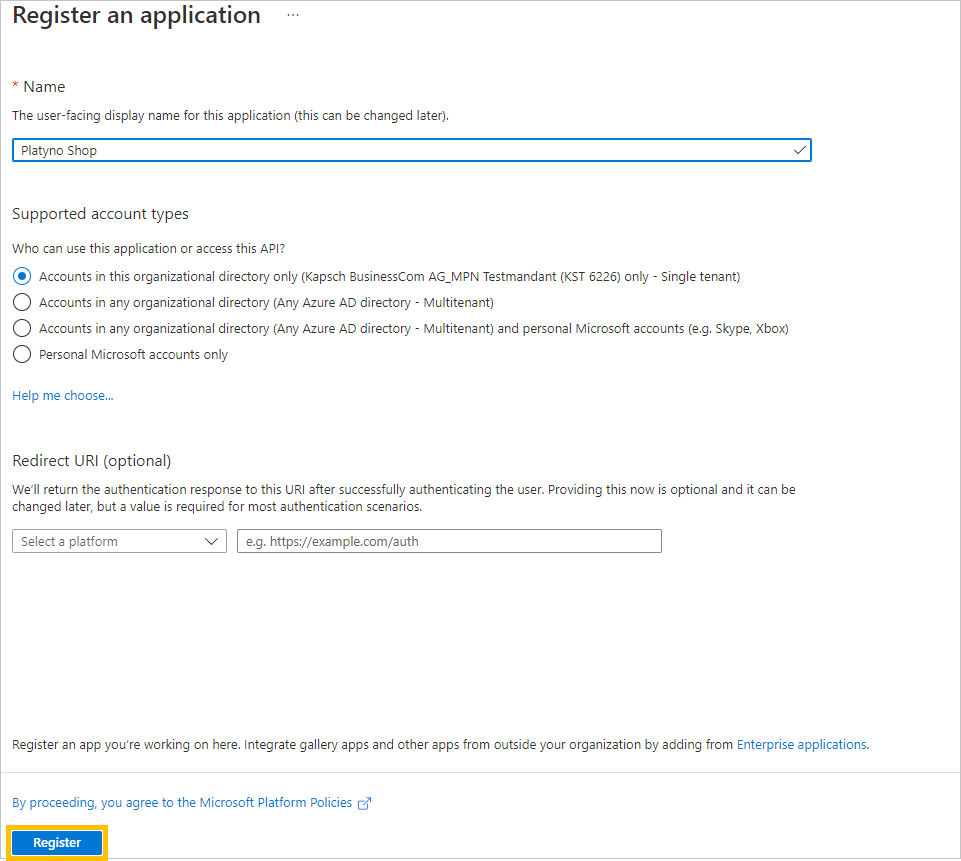
Open the Azure Portal.
Click New registration.
Fill in the name and confirm by clicking Create.
Configure API scope
In the app registration page, select Expose an API on the left.
For Application ID URI, click Set.
- Under Scopes defined by this API, click Add Area.
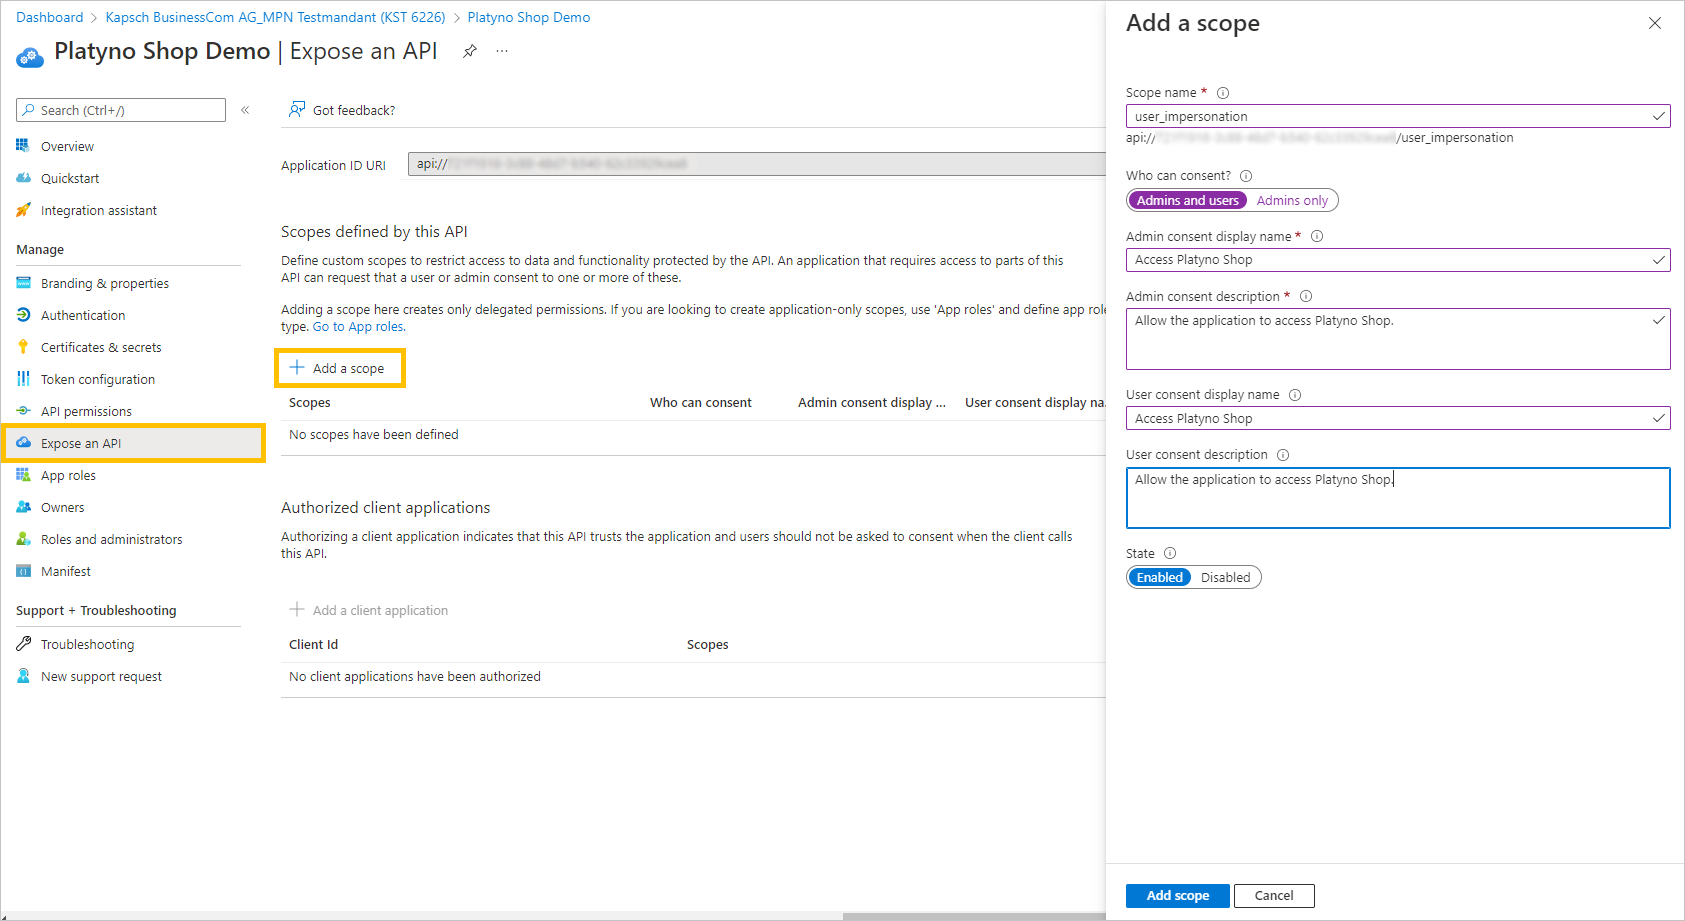
- Assign the following information:
- Scope name: user_impersonation.
- Who can consent?: Administrators and users
- Admin consent display name: Platyno Shop Access
- Admin consent description: Allows the application to access the Platyno Shop.
- User consetnt display name: Platyno Shop Access
- User consent description: Allows the application to access the Platyno Shop.
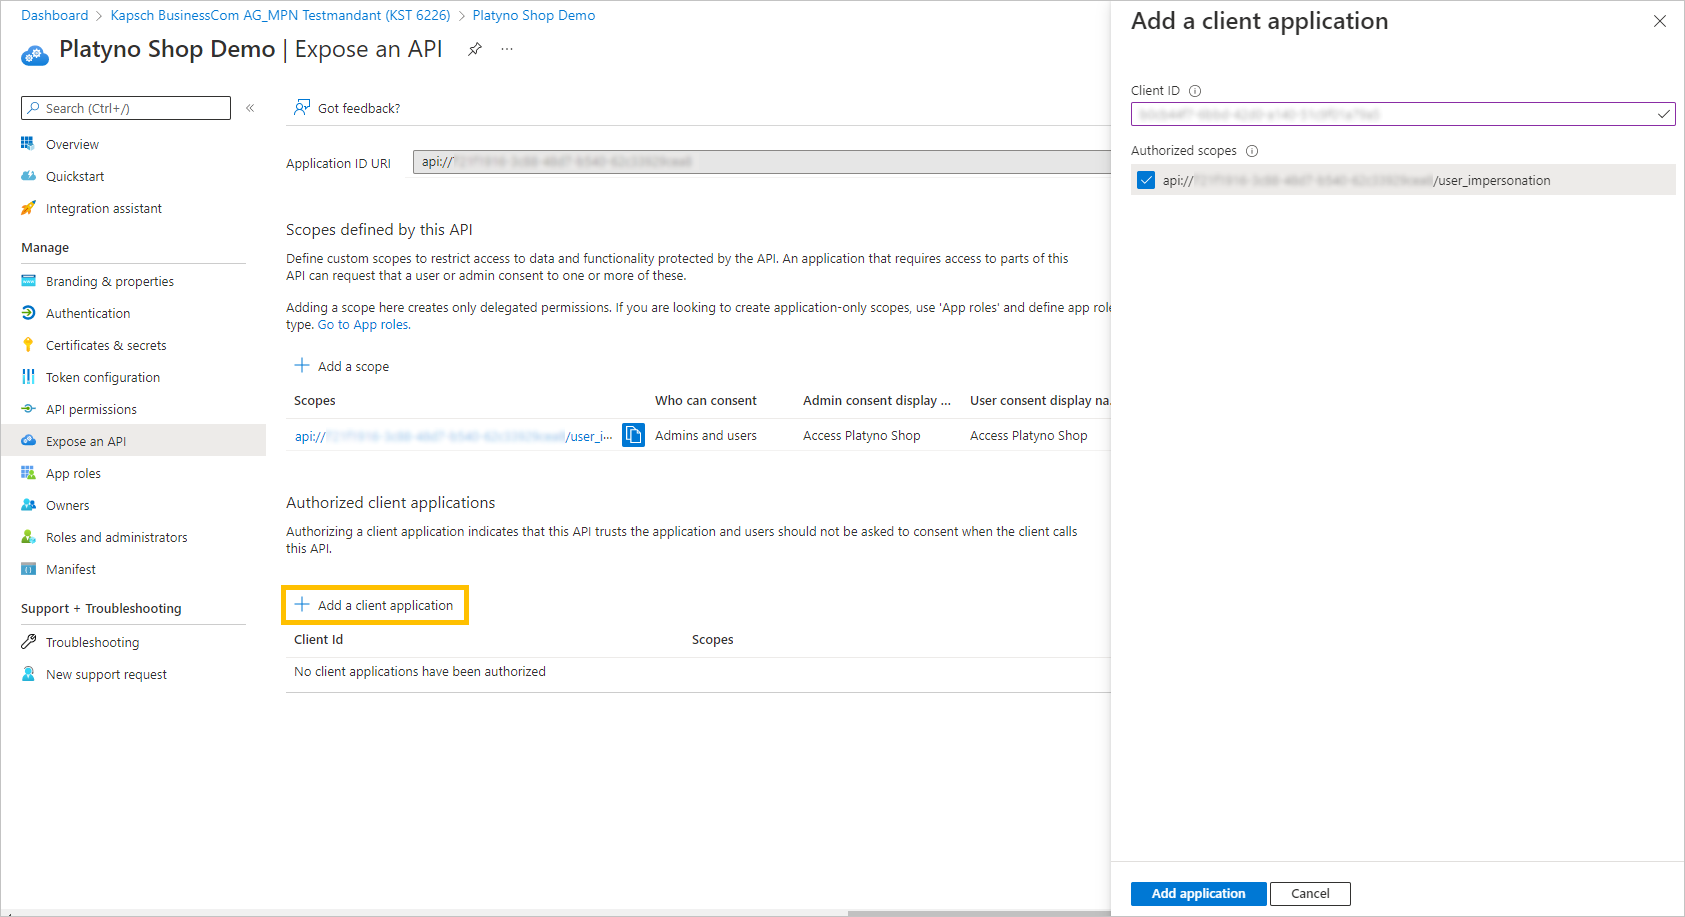
- Under Authorized client applications, click Add a client application.
The Client ID corresponds to the ID of the registered SharePoint App in the SPFx Solution. To find out the Client ID, go to the App Registrations in the Azure Portal, then go to All Apps and search for "sharepoint". The name may be different but is similar to: "SharePoint Online Client Extensibility Web Application Principal".
- For Authorized scopes check the box with the area you created earlier.
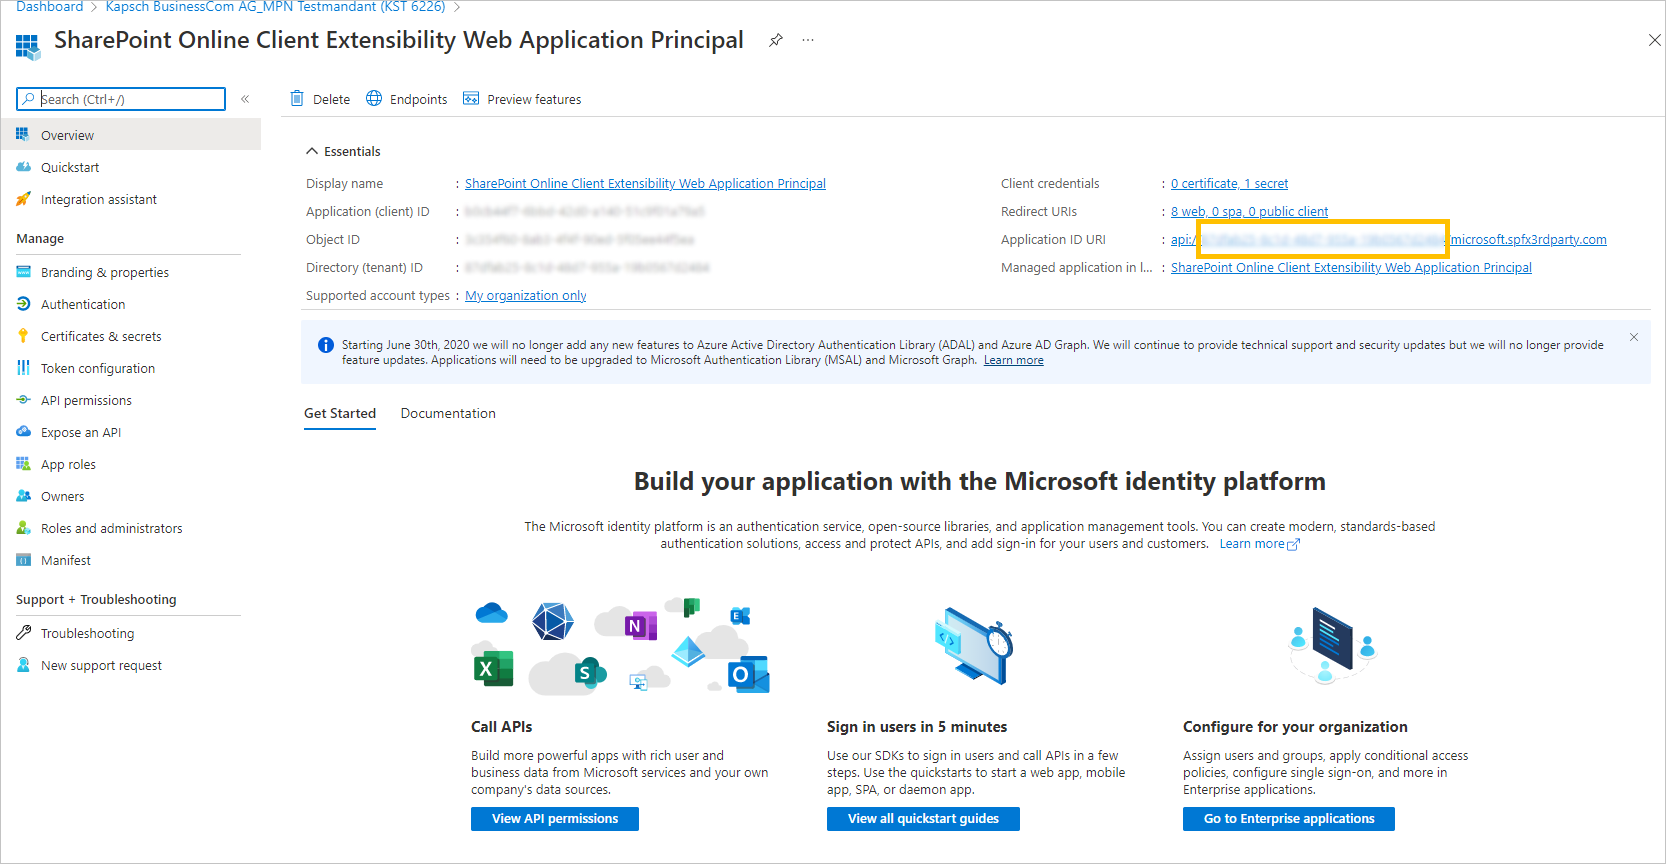
- Repeat steps 6 and 7 with the client id "08e18876-6177-487e-b8b5-cf950c1e598c" to add the current SharePoint Online Principal.
Configure Azure Logic App
Open the Azure Portal.
Open the resource group that contains the workflows.
For the two workflows platyno-shop-flow-cancel-order and platyno-shop-flow-start-order, please perform the following steps.
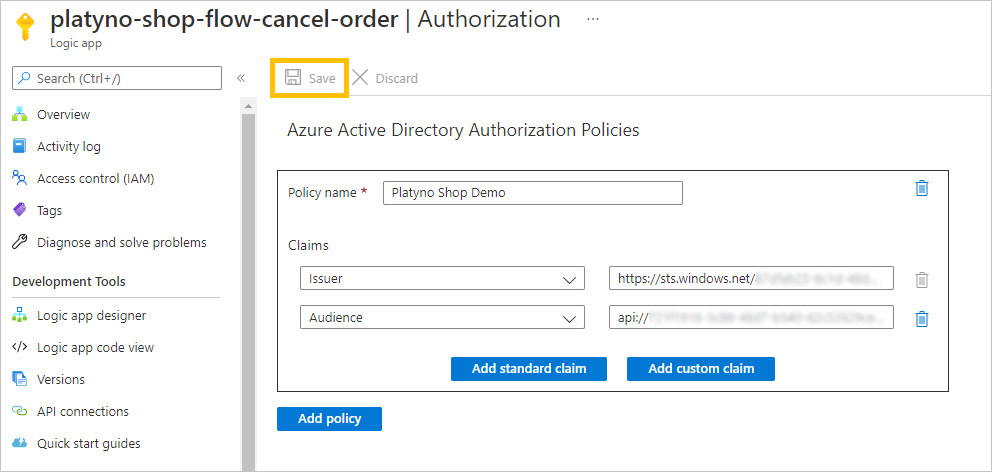
Click on the menu item Authorization on the left and then on Add policy.
Give the policy a name.
For Issuer enter the following value
https://sts.windows.net/{tenantId}/with the corresponding Tenant ID.Click Add standard claim.
For Audience, you can copy the application ID URI from step 2 from the Configure API Scope section.
Save the configuration by clicking Save.
Configure Platyno Shop
Open the Platyno Shop page and click Edit.
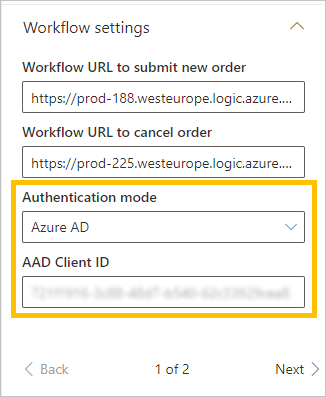
In the webpart settings go to the Workflow settings section.
Authentication allows you to enable authentication for the configured flows.
If Azure AD is selected as authentication, you can use the AAD Client ID field to copy the Application ID URI from step 2.
This can be copied from the App Registration overview page from step 2 from the Configure API Scope section.
URL SignatureIf the workflow was previously configured using a URL signature, please remove the URL parameters from the workflow URL.
